Agent Configuration Overview
Last updated: September 29, 2026
Everything your Marketing Agent does is set up in one place. The Agent Configuration page controls how the agent talks to visitors, what it knows, when it brings in a human, and where it appears on your site.
Use this page as a map. It shows which tab holds each setting, and the order that works best when you are setting up an agent for the first time.
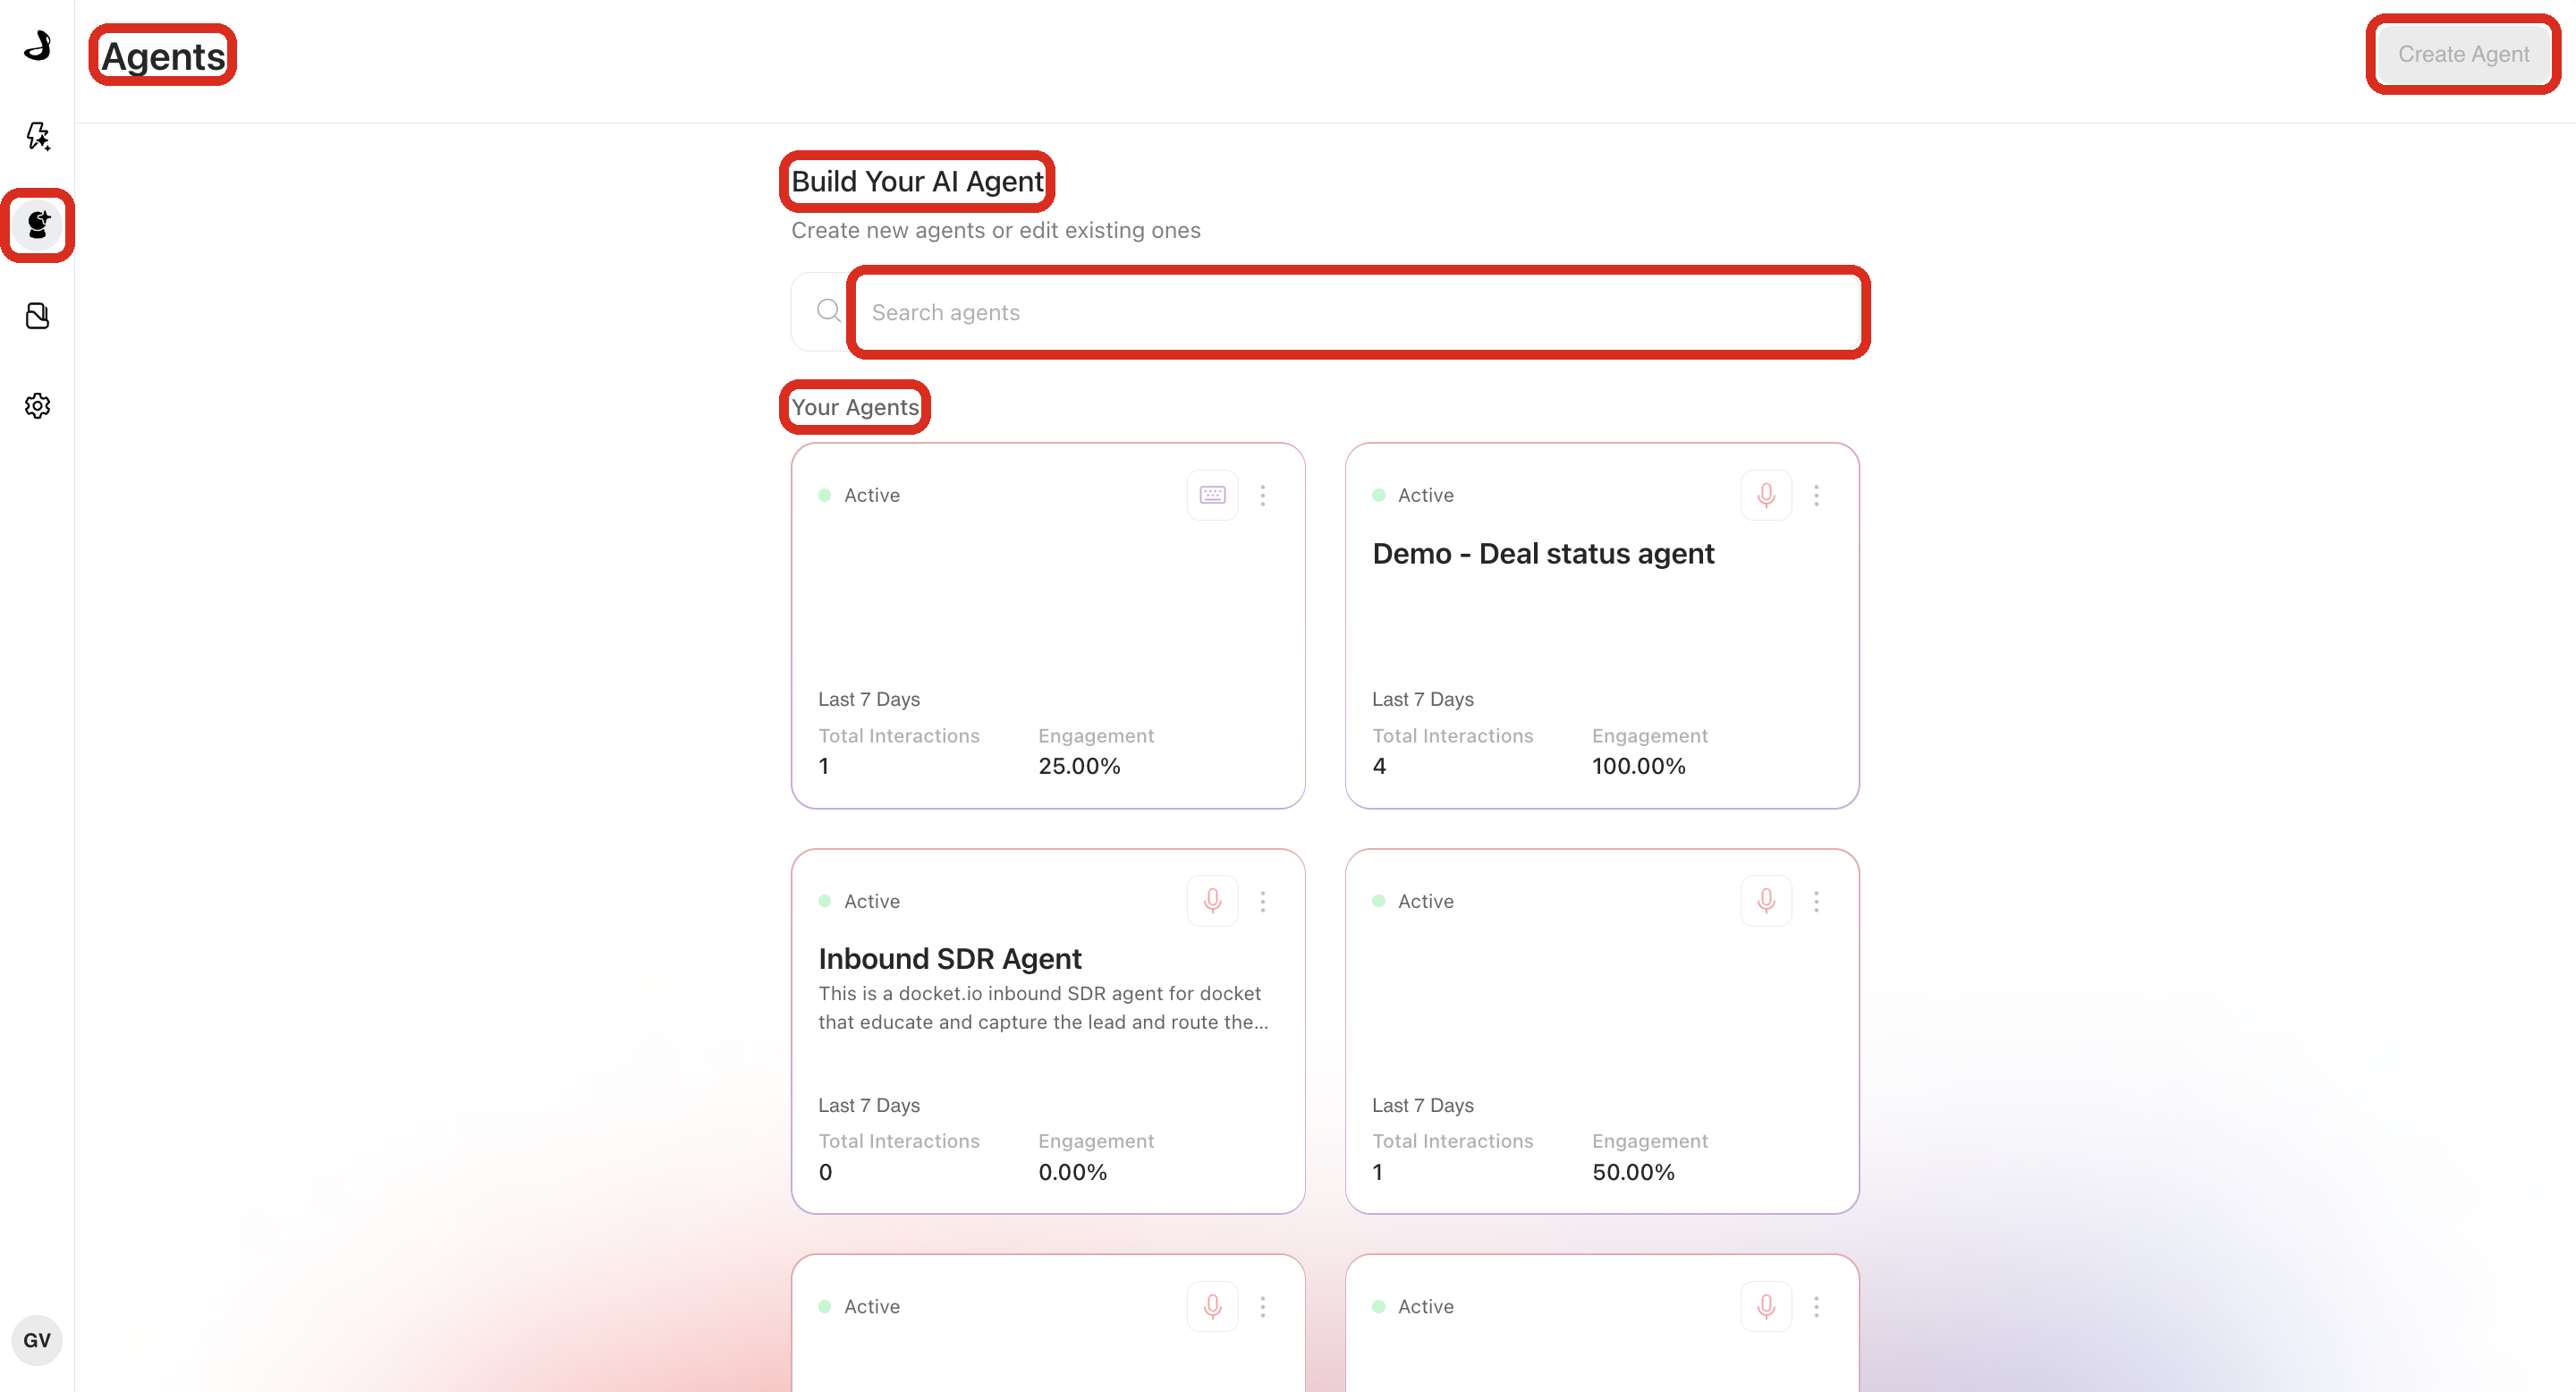
To open it, go to Marketing Agent Configuration and select an agent card under Your Agents. If you have not created an agent yet, start with Creating a Marketing Agent.
What can you configure on each tab?
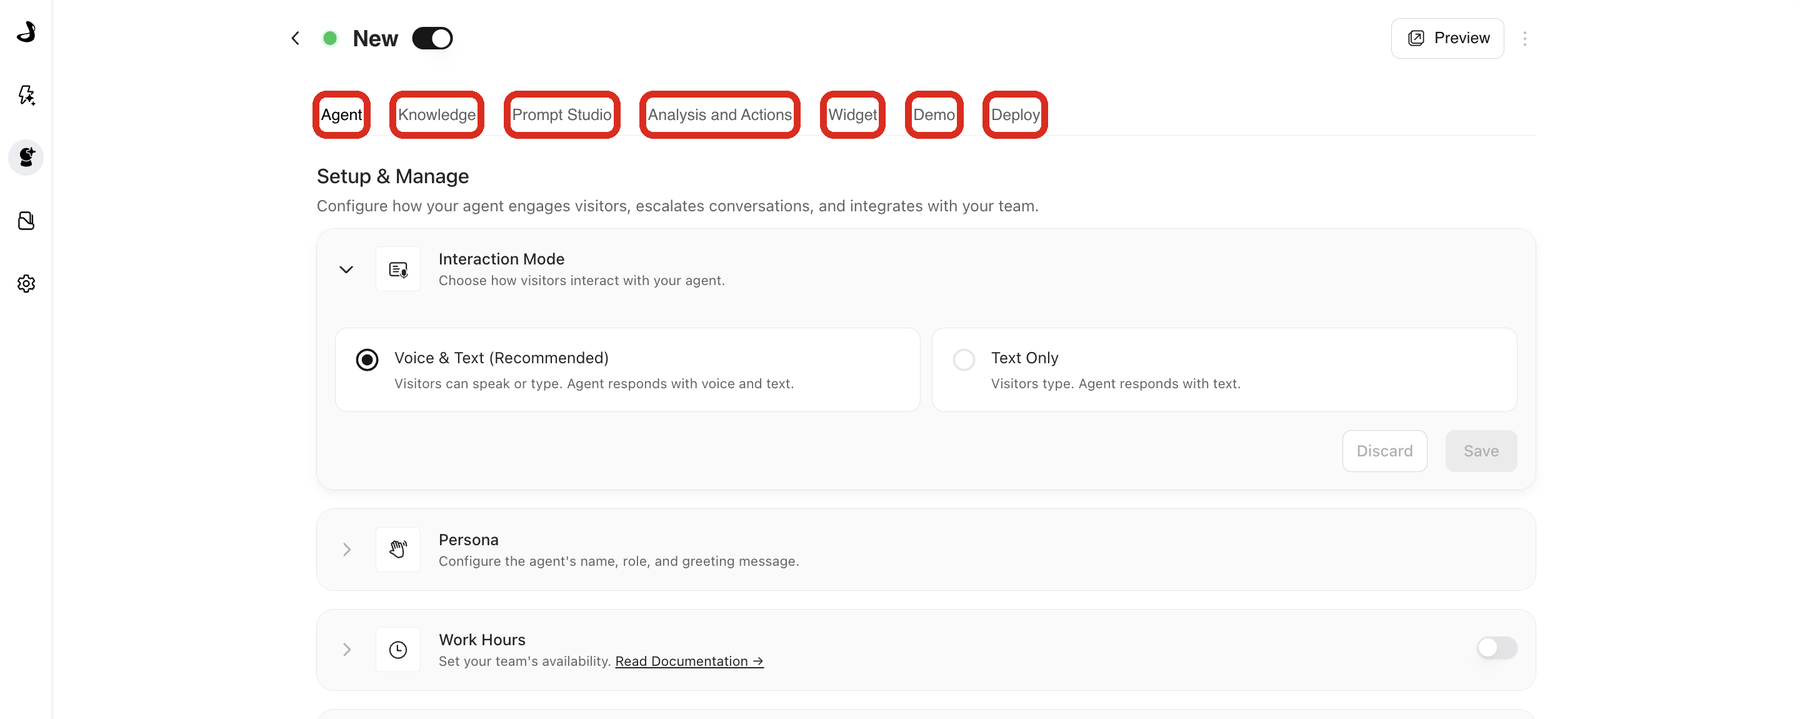
Each tab owns one part of the agent. You can move between them in any order, and each tab saves on its own.
Tab | Use it for |
|---|---|
Agent | Interaction mode, persona, work hours, handoff, CTAs, email validation, dynamic context, and archiving. |
Knowledge | The sources, slides, and videos the agent can draw on during a conversation. |
Prompt Studio | Changing the agent's behaviour in plain English, with version history and rollback. |
Analysis and Actions | Post-call analysis, post-call actions, alerts, and CRM or marketing automation sync. |
Widget | Appearance, position, page targeting, domain whitelist, and widget behaviour. |
Deploy | Deployment script, standalone page URL, and IP access rules. |
What is on the Agent tab?
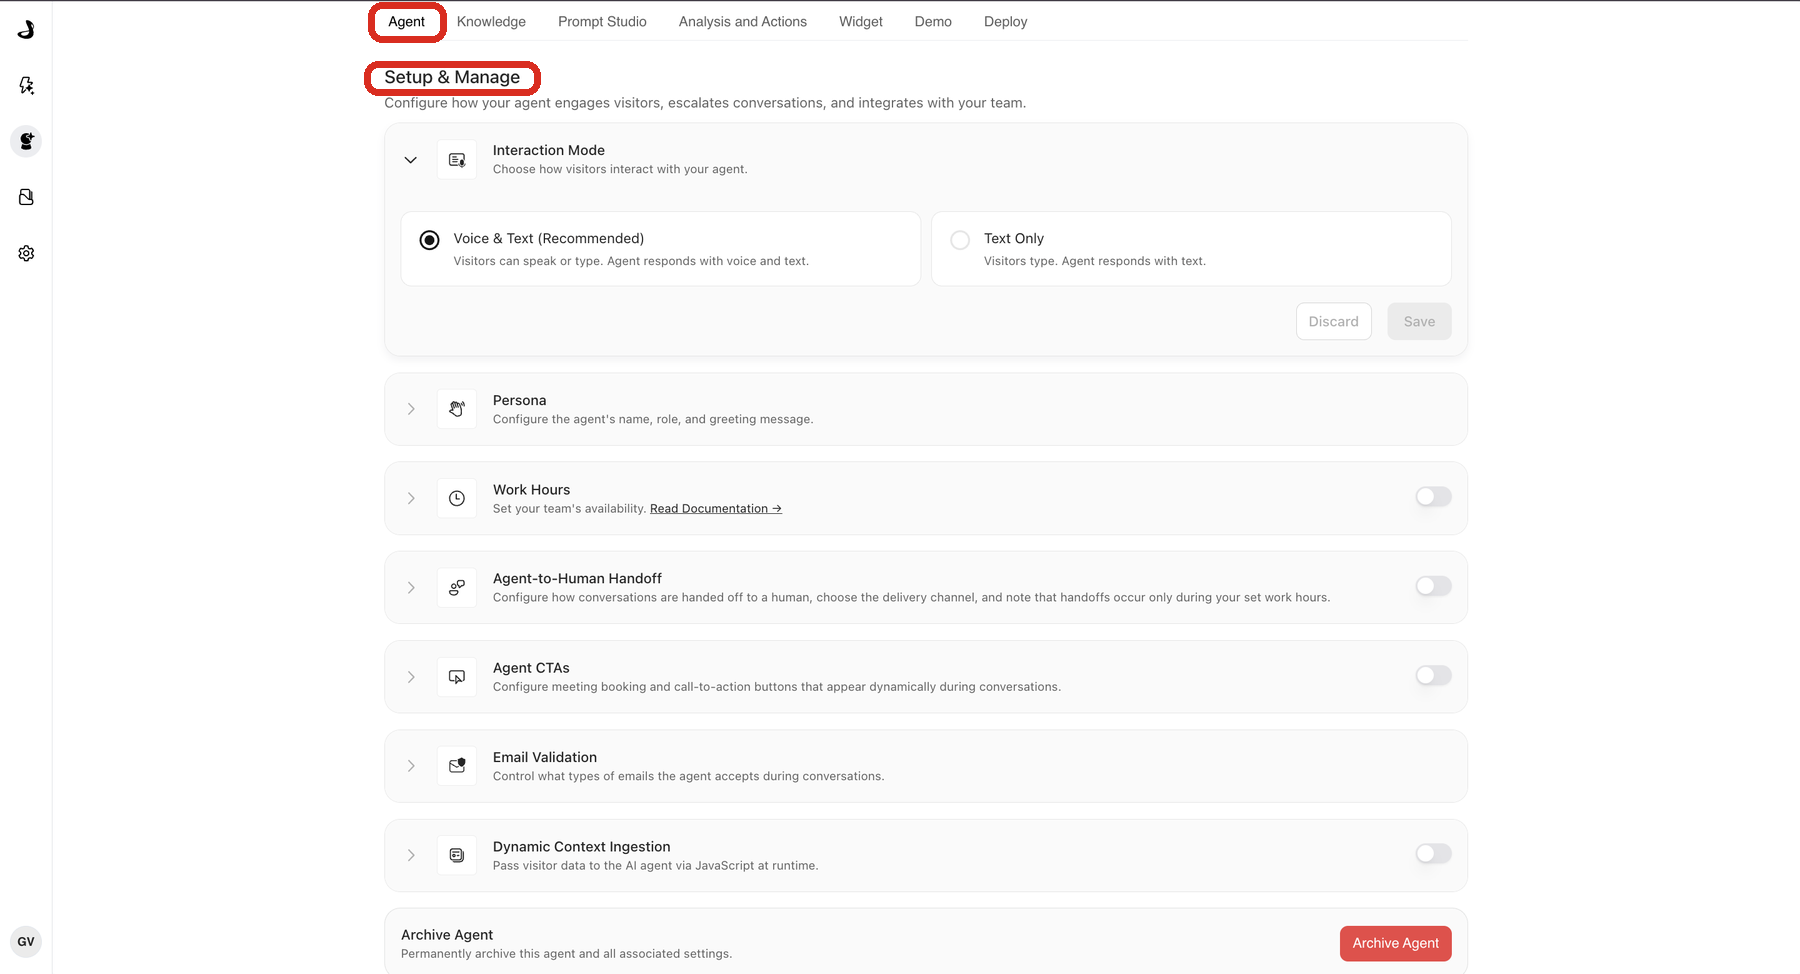
The Agent tab holds the settings that decide how the agent behaves in a conversation. They appear under Setup & Manage in this order:
Interaction Mode sets whether visitors can speak as well as type. See Understanding Agent Modes: Voice & Text vs Text Only.
Persona sets the agent's name, greeting, and avatar. See Configuring Persona, Greeting, and Avatar.
Work Hours sets when your team is available. See Setting Up Work Hours and Availability.
Agent-to-Human Handoff brings a teammate into a live conversation. See Configuring Agent-to-Human Handoff.
Agent CTAs adds call-to-action buttons and meeting booking. See Setting Up Agent CTAs.
Email Validation controls which kinds of email address the agent accepts.
Dynamic Context Ingestion lets your site pass what you already know about a visitor. See Setting Up Dynamic Context Ingestion.
Archive Agent retires the agent permanently. See Archiving and Managing Agent Lifecycle.
What order should you configure an agent in?
This order gets an agent ready with the least backtracking, because each step builds on the one before it.
Open the Agent tab and set the interaction mode, persona, and instructions so the agent knows who it is.
Add approved content on the Knowledge tab so it has something accurate to say.
Set Work Hours, then Agent-to-Human Handoff, so escalation matches when your team is actually around.
Add Agent CTAs so qualified visitors have a next step, including meeting booking. For routing meetings to the right rep, see Intelligent Routing for Docket Marketing Agent Meetings.
Set up follow-up data on the Analysis and Actions tab.
Customise the visitor-facing experience on the Widget tab.
Finish on the Deploy tab, then test with Preview.
Frequently asked questions
Do my changes go live as soon as I save?
Settings on the Agent, Knowledge, Analysis and Actions, Widget, and Deploy tabs take effect when you select Save in that section. Prompt changes made in Prompt Studio are different: they collect in a draft, and visitors keep seeing the current version until you publish it.
Where do I set up meeting booking?
Meeting booking lives inside Agent CTAs on the Agent tab. Open that section and select Configure on the Meeting booking card. Routing rules and calendar settings are both in that panel.
Which tab controls what visitors actually see?
The Widget tab controls appearance, position, and where the widget shows up. The Agent tab controls what the agent says and does once a visitor starts talking to it.
Can I pause an agent instead of archiving it?
Yes. Use the toggle next to the agent name at the top of the configuration page to make an agent inactive, which is reversible. Archiving is permanent and also removes the agent's analytics.
Why does my agent behave differently from what I configured?
Check Persona, the agent's instructions, and the selected Knowledge sources together, since all three shape a reply.